Skip to content

Cart

Your cart is empty

The Home Studio Series  ·  Nº 01

The At-Home
Wax Carving Studio

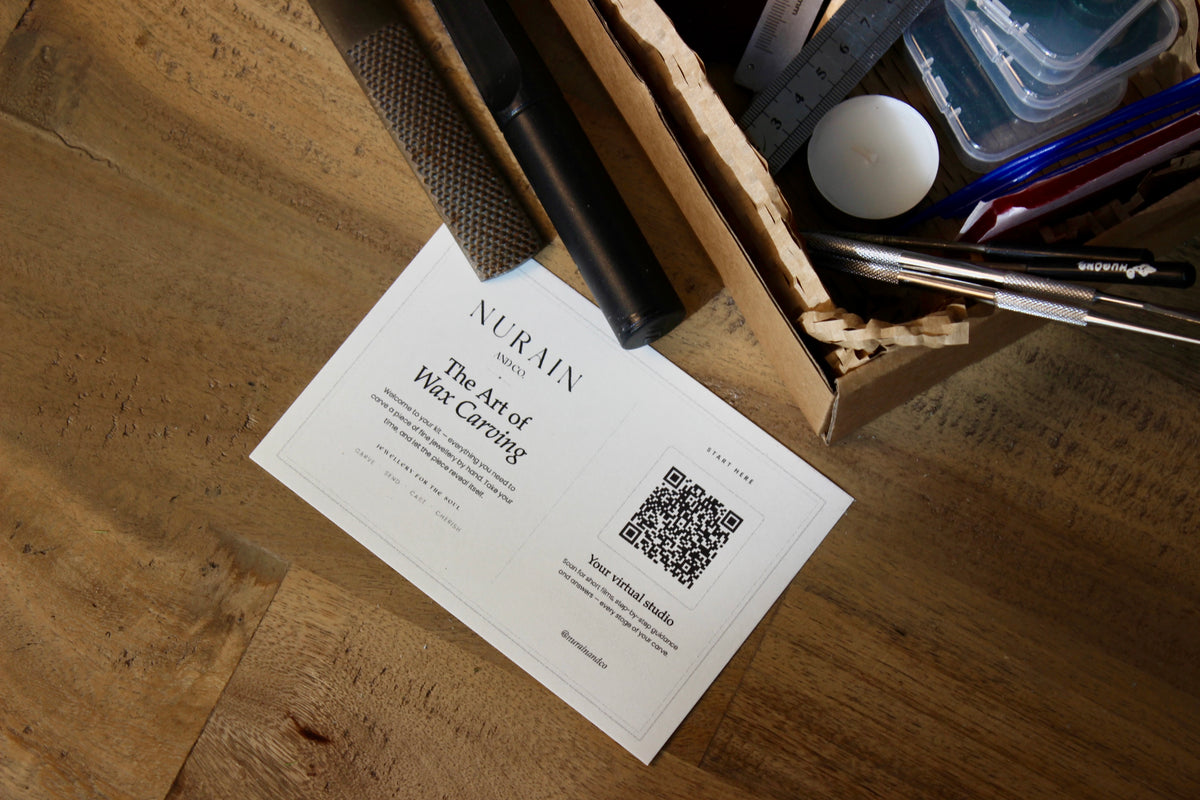
Your companion for the kit — short films, step-by-step guidance, and answers for every stage of carving your own piece by hand.

Shop the kit
CarveSendCastCherish
A look inside

What’s waiting in the studio

Every kit comes with an access code. It opens ten short films, the full illustrated guide, and every answer below.

10Short films
16Fixes
18Answers
17Page guide
Quick Start & Overview Your Three Waxes Your Tools The Carving Process Organic Design Signet Design Finishing & Polish Safety Casting Returning Your Kit
Unlock videos with purchase
Nº 01Start here

Quick start & overview

New to wax carving? This is the whole journey at a glance — from your first sketch to sending your finished wax back to us to be cast.

Each of the ten topics opens a short film, its own step-by-step notes, a studio tip, and a link straight to the right page of the guide.

Good to know

Troubleshooting

Fixes for the things that actually go wrong.

ViewClose
  • My wax cracked or broke
  • My ring is too tight
  • My tool slides without cutting
  • I removed too much / gouged it
  • My band is uneven in thickness
More fixes inside
Answers

Frequently asked questions

Answers, from first sketch to finished metal.

ViewClose
  • How do I find my ring size?
  • Will casting capture my detail?
  • How thin is too thin?
  • How much metal will my piece need?
  • What are the blue and red waxes for?
More answers inside
Open to everyone

Questions before you buy

How the kit works, whether to keep it or return it, and exactly what happens when your wax comes back to us.

Do I need any experience?
Not at all. The kit, the guide, and our virtual guidance are made for first-timers — start on the sample waste pieces and take your time.
What can I make?
Rings, pendants, charms, and small sculptural pieces — anything you can carve within the kit’s wax blanks.
What’s in the kit?
Three waxes — green for carving, blue for fingerprints, red for sculpting — plus spare scraps and sample pieces to practise on. Then your tools: metal carving tools, wax files, needle files, a wax ring sizer, vernier calipers, ruler, sandpaper, pencil, transfer and tracing paper, and a fan brush. A tea light for your flame, tags for labelling, transport boxes and a prepaid return label for sending your wax home to us. The full 17-page guide and this virtual studio come with it.
Should I buy the kit or take the returnable one?
Buy it to keep if you’d like to carve again — the tools are yours for good. Choose the returnable kit if this is a one-off: you pay a refundable $75 deposit at checkout and send the reusable tools back when you’re done. Either way you get the same tools, the same waxes, and the same guidance.
How does returning the kit work?
Pack the reusable tools back in the box within 30 days of delivery, using the prepaid return label included — and add your finished wax too, if it’s ready to be quoted for casting. We check everything over and refund your $75 deposit to your original payment method within 5 business days. Missing or damaged tools may reduce the refund. Your consumables — the waxes and scraps, sample pieces, sandpaper, papers and tea light — are yours to keep either way.
How does the casting work?
You carve the wax, we turn it into metal. When you’re finished, label each piece with the tags included — your initials and a number — take a photo of each, and pack them in the transport box rather than a padded envelope, as wax needs firm walls around it. Attach the prepaid return label and send it to us. We weigh and review your piece, then send you a casting quote. Nothing is cast until you approve it. Once you say yes, we cast, hand-finish, polish, and ship your jewellery home to you, usually within 2–3 weeks.
Is casting included in the kit price?
No — casting is quoted separately once your wax is in hand, so we can price the metal precisely. .925 sterling silver is $10 per gram, with polishing, finishing and the casting-wastage allowance all included. Gold is available in 10k, 14k and 18k, starting at about 10× the price of silver and fluctuating with the karat, the day’s spot price and the weight of your piece.
How much will my piece weigh in metal?
Wax is light — sterling silver weighs about 10.5× your wax model, plus roughly ten percent for the sprue and casting wastage. So a wax of around 0.5 g becomes about 5–6 g of silver. It’s a useful way to picture the finished weight, and the cost, before you send it.
Do I get my wax carving back?
The wax is used up during the lost-wax casting process, so it can’t come back — which is why we suggest photographing each piece before you post it. What comes home is the same design in solid metal.
Can we make matching rings as a couple?
Yes — to carve two rings at the same time, you’ll likely each want your own kit, so there’s one set of wax and tools per person. A single kit can also work if you’re happy to make them one after the other.
Is help available while I carve?
Always. Virtual guidance is included — message us anytime on Instagram @nurainandco, from your very first sketch to packing your finished wax.
Home Kit  ·  Virtual Studio

A private studio

Enter the access code enclosed with your kit to open your films, guidance, and answers.

That code doesn’t match — check the card in your kit and try again.
No kit yet? Shop the kit  ·  Lost your code? Message @nurainandco
The Virtual Studio

Watch, learn, & make

Choose a topic to open its short film and guidance. Scroll the row to explore all ten — troubleshooting and answers wait just below.

Watch the film
Nº 01Start here

Quick start & overview

New to wax carving? This is the whole journey at a glance — from your first sketch to sending your finished wax back to us to be cast. Watch this first, then dive into the topic you need.

  • Read through the full guide once before you begin.
  • The path: sketch → size → shape → carve → finish → send.
  • Whatever detail you can see in the wax appears in the finished metal.

Pro tipWarm up on the sample waste pieces before your real blank — a few practice cuts teach you how the wax moves.

Open in the guide →
Watch the film
Nº 02Materials

Your three waxes

Your kit includes three waxes, each for a different job. Knowing which to reach for makes everything easier.

  • Green — your main carving wax. Hardest of the three, holds the finest detail and engraving.
  • Blue — for fingerprints. Heat until molten, then press your fingertip straight in.
  • Red — for sculpting. Built up and blended on for soft, raised detail.

Pro tipKeep your green wax scraps — a drop melted onto a hot tool repairs cracks and places perfect little raised beads.

Open in the guide →
Watch the film
Nº 03Your kit

Your tools

Every tool in the kit and what it is for — from the metal carving tools to the wax ring sizer, files, and the tea light you'll use to smooth and fuse.

  • Metal carving tools, wax files & needle files for shaping and detail.
  • Wax ring sizer — insert, rotate, and change sides so the bore stays even.
  • Calipers, ruler, sandpaper, fan brush, tea light & transport boxes.

Pro tipWarm your carving tools over the flame so they glide through the wax — but never your files. Keep tools sharp and your bench brushed clear.

Open in the guide →
Watch the film
Nº 04Step by step

The carving process

The full process, from a bare blank to a finished carving, in eight unhurried steps.

  • Sketch & plan · size your ring · shape the band with your file.
  • Transfer or scribe · carve · add fine detail.
  • Fuse & smooth over the flame · refine & finish.

Pro tipMark a centre line and your band width with the calipers before you cut — measure once, then carve slowly.

Open in the guide →
Watch the film
Nº 05Technique

Making an organic design

Free and sculptural, for a flowing, one-of-a-kind form. There is nothing to measure and much to feel.

  • Sand → File → Flame.
  • Rough out the form by sanding, refine the curves with your file.
  • Smooth and blend with a pass just above the flame. Embrace asymmetry.

Pro tipLet the flame do the finishing — a whisper of heat melts tool marks into a soft, molten sheen.

Open in the guide →
Watch the film
Nº 06Technique

Making a signet design

Precise and drawn, for crisp, symmetrical motifs, lettering, and crests, where placement must be exact.

  • Sand → Measure → Transfer → Scribe → File.
  • File the top perfectly flat and square to the sides first.
  • Measure and mark with the sharp tips of your vernier calipers.

Pro tipA true, flat face makes the whole ring read as fine — get the top square before you add a single detail.

Open in the guide →
Watch the film
Nº 07The finish

Finishing & polishing

Two ways to finish — and how to keep your piece strong enough to cast beautifully.

  • Keep the tool marks for hand-carved character, or polish smooth with the ruler's edge.
  • Never carve below 1 mm; aim for 1.5–2 mm on bands.
  • Check thickness at several points, not just the front.

Pro tipYou'll hear the ruler polishing — a soft, even hiss means the surface is closing up smooth.

Open in the guide →
Watch the film
Nº 08Studio safety

Working safely

A gentle craft, but sharp tools and an open flame still ask for a little care.

  • Carve away from your body and non-dominant hand.
  • Respect the flame — keep it clear, tie back hair and sleeves.
  • Hot wax can burn — let wax and tools cool before touching.

Pro tipDon't take fingerprints in green wax — it can scorch when heated. Use the blue wax, which is made for it, and practise on scrap first.

Open in the guide →
Watch the film
Nº 09The final step

Casting your piece

When your carving is finished, send it back to us to be cast, finished, and returned as fine jewellery.

  • Label each piece — initials & a number — and photograph it.
  • Pack it in the transport box, attach the prepaid label, send it back.
  • We quote; you approve; we cast, polish & ship it back — usually 2–3 weeks.
  • .925 sterling silver at $10/g (your quote includes wastage); gold from about 10× silver, varying with karat, the day's spot price & weight.

Pro tipPhotograph each wax beside its tag before you mail your pieces — it's your record until your quote arrives.

Open in the guide →
Watch the film
Nº 10Returnable kit

Returning your kit

Chose the returnable kit? A refundable deposit is held at checkout and returned once the kit comes home to us. Here's how to get it back.

  • Return within 30 days of delivery, using the prepaid label in your box.
  • Include all reusable tools in usable condition — and your finished wax too, if it's ready to cast.
  • We inspect, then refund your $75 deposit to your original payment within 5 business days.
  • Missing or damaged tools may reduce the refund.

Pro tipYour consumables — the waxes and scraps, sample pieces, sandpaper, papers and tea light — are yours to keep.

Open in the guide →
Good to know

Troubleshooting

Almost every hiccup in wax carving is fixable — open to browse the fixes.

View allClose
My wax cracked or broke
Don't throw it out. Warm the original wax first, drip a little spare scrap wax onto the crack, then smooth the join with a warmed tool. Heating the original helps the two waxes re-bond as they cool — stable enough to keep carving.
It feels almost impossible to carve — the wax is so hard
Green is the hardest of the waxes (which is why it holds the most detail). Use your wax file for bulk removal, keep a light touch, and warm your tool tip over the flame so it glides. Take shavings, not chunks.
My tool slides without cutting
You're burnishing, not carving. Change the angle of the tool until it lifts a shaving with each pass — or warm the tip a little so it bites into the wax instead of polishing it.
I removed too much / gouged it
Easily repaired. Warm the area, drip on scrap wax to build it back up, let it cool, then re-shape. Going forward, remove a sliver at a time rather than large cuts.
A prong or thin part snapped off
Green wax breaks before it bends, so thin parts are fragile. Rebuild with scrap wax and a warm tool, support delicate areas with a finger as you work, and keep them at or above 1 mm.
My ring is too tight
Insert the ring sizer into the bore and rotate to scrape the inner wall, changing sides as you go so it opens evenly. Try the fit gently; if it sticks on your finger, ease it off slowly rather than forcing it.
I opened the ring too big
Build the inner wall back up with scrap wax, let it cool, and re-size carefully — or start fresh on a new blank. Next time, aim slightly small and open up gradually.
My ring isn't round / looks oval
Keep it on the ring sizer as you work, rotate it constantly, and file with even strokes. Check from several angles as you go rather than only from the front.
My band is uneven in thickness
Check with your calipers at several points around the ring, then file only the thicker areas, testing as you go until it reads consistent all the way around.
My warmed tool isn't melting or smoothing anything
It needs more heat. Hold it over the flame a little longer, then return to the wax and try again with a light touch.
The surface won't get smooth
Finishing is the slowest stage — work lighter and slower. Then burnish with the smooth edge of your ruler, or a brief pass just above the flame. Good light (and a magnifier) makes a real difference.
My piece darkened or got sooty
No problem at all — that's just soot from the flame settling into the wax. It doesn't affect your carving and it doesn't impact casting.
My design lines faded
Lay your transfer paper and sketch back over the wax and retrace the missing section. Your drawing is there to guide you the whole way through.
I lost detail when smoothing over the flame
Keep flame passes brief and the piece moving so the surface softens without melting away. Re-engrave any fine lines you softened once it cools.
I've carved it too thin
Never go below 1 mm — thinner is fragile, hard to handle, and may not fill cleanly in casting. If a spot has gone too thin, build it back up with scrap wax and a warm tool.
I'm not sure it will cast well
Very thin walls and fragile joins can cause incomplete filling or porosity. We review every wax before casting and will let you know if anything needs adjusting.
Answers

Frequently asked questions

Everything people usually ask before and during their first carve — open to browse the answers.

View allClose
Do I need any experience?
Not at all. The kit, this guide, and our virtual guidance are made for first-timers — start on the sample waste pieces and take your time.
Will my finished piece be the same size as my wax?
Almost exactly the same — your piece casts almost exactly as you carve it, so work at your true, intended size. Any tiny shrinkage is accounted for.
Will casting capture my detail?
Yes — lost-wax casting captures your detail faithfully and exactly, right down to fine engraved lines. Keep lines and walls around a millimetre or more so everything casts cleanly.
How thin is too thin?
Below about 1 mm the piece becomes fragile, hard to handle without breaking, and may not fill cleanly when cast. Aim for 1.5–2 mm on bands, and keep the thickness even.
How much metal will my piece need?
Wax is light — sterling silver weighs about 10.5× your wax model, plus a little for the sprue and casting wastage. A ~0.5 g wax becomes roughly 5–6 g of silver.
What metals can I choose?
.925 sterling silver at $10/g — polishing, finishing, and a small casting-wastage allowance are all included in your quote. Gold comes in 10k, 14k, and 18k, starting at about 10× the price of silver and fluctuating considerably with the karat, the day's spot price, and your piece's weight, so your quote gives you the real range.
Do you set stones?
We keep our pieces stone-free — and it's a choice we love. Stones need maintenance and resetting over the years, which creates an ongoing lifecycle for a piece. Without them, your jewellery is solid metal that can last for generations.
What can I make?
Rings, pendants, charms, and small sculptural pieces — anything you can carve within the kit's wax blanks.
What are the blue and red waxes for?
Green is your main carving wax. Blue is best for fingerprints — it's soft and takes an impression cleanly when gently warmed. Red is for sculpting soft, raised detail onto your piece.
Can we make matching rings as a couple?
Yes — to carve two rings at the same time, you’ll likely each want your own kit, so there’s one set of wax and tools per person. A single kit can also work if you’re happy to make them one after the other.
How do I find my ring size?
Just keep using the ring sizer until the band fits your finger. If a blank is too big — say, for a pinky — add a little drop of hot wax inside the band to bring the size down, almost like a sizing bead.
Can I send more than one piece at once?
Yes. Mark each piece with your initials and a number using the included tags, and take a photo of each, so every quote matches the right piece.
What if I make a mistake or crack the wax?
Most things are fixable — warm wax fuses, rebuilds, and re-carves. Have a look at the troubleshooting section for the common ones.
How long does it take to get my piece back?
Usually about 2–3 weeks from approving your quote. We weigh and quote first — nothing is cast until you approve — then cast, polish, and ship it back to you.
Do I need to send my tools back?
Only if you chose the returnable kit — pack the reusable tools in the same box as your wax to have your deposit refunded. If the kit is yours to keep, just send your finished piece.
How do I care for my finished piece?
Silver is remarkably durable, especially with no stones to maintain. It does tarnish gently over time — but just wear it for a day or two and it brightens right back up. A soft jewellery cloth keeps it bright, too.
Is the wax safe to work with?
Yes, with the usual studio care — mind the sharp tools and open flame, let hot wax cool before touching, and keep the kit away from children and pets.
Can I get help while I carve?
Always. Message us anytime on Instagram @nurainandco — from your first sketch to packing your finished wax.

Ready to begin?

Everything you need to carve a piece of fine jewellery by hand — and our guidance the whole way.

Jewellery for the Soul

Precious Metal Jewelry

Join our virtual studio to learn how to make your own fine jewelry.

Heirlooms for the Modern World

Timeless jewellery inspired by fine jewelry tradition, crafted in precious metals to last generations